
MACWORLD [05/02/13]
Essential tips and tricks to make it easier to read text in OS X
When you’re on the other side of 50, as I am, you become less concerned about how fast your Mac is, and more interested in how well you can see the text it displays. Whether your eyes are aging, your young eyes need glasses, or someone that you provide computer support for could use a boost in seeing the screen, no one should have to squint when surfing the Web, reading email, or writing documents. A few key techniques can increase the font size in applications where easy-to-see text makes the biggest difference.
Bigger fonts and word processing
Most applications that let you compose text also let you adjust the font size. If you’re using a word processor such as Apple’s Pages or Microsoft's Word, or a text editor such as Apple’s built-in TextEdit, you have numerous font and size options. It’s a good idea to increase your font size by a few points if you use corrective lenses; even if the font looks all right, you might not realize that you’re squinting.
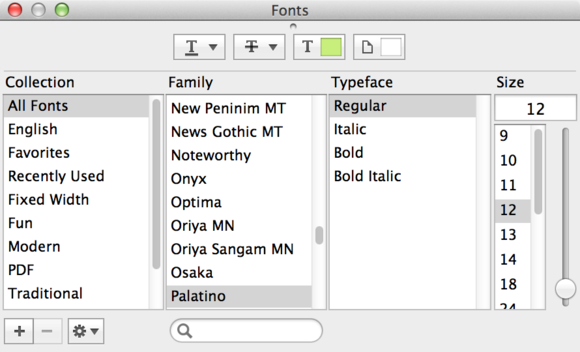
In Apple apps such as Pages and TextEdit, pressing Command-T brings up a Fonts panel. Word and other text-heavy programs have a dedicated Font or Format menu. (In Word, choose Format > Font.) There, you can choose the font and size that you find most comfortable to work with.
 |
Bigger fonts and browsing the Web
Many apps use the Command-plus (+) shortcut to increase font size. For example, if you use Apple’s Safari or Mozilla's Firefox as your browser, you can press that keyboard shortcut—or choose View > Zoom In—at any time. If the fonts are too big on certain pages, Command-minus (−) makes them one notch smaller. Many other apps that display text use the Command-plus shortcut as well, so try it if you ever need to make text bigger in a particular application.
Safari settings: As an alternative approach in Safari, go to Safari > Preferences and click the Advanced tab. Under 'Accessibility', select Never use font sizes smaller than and adjust the font size to a comfortable level.
Trackpad tips: In Safari, you can also zoom in to increase the size of the entire page. If you use a trackpad, you can pinch out to zoom in, and pinch in to zoom back out. This works in some other apps as well. (If it doesn’t work for you, check Zoom In or Out in the Scroll & Zoom section of System Preferences’ Trackpad pane.) You can also double-tap with two fingers to get a quick zoom in Safari; double-tapping again zooms out. (This setting is also in the Trackpad preference pane.)
 |
you can get the perfect-size fonts in Finder windows. |
To make it easier to see folder and file names in Finder windows, press Command-J, or choose View > Show View Options, when a Finder window is visible. Select Text Size, and you'll get a popup menu that lets you choose a font size of from 10 points to 16 points. Click Use as Defaults to apply this new font size to all windows in the current view. You’ll have to make this change for each different Finder view you use (Icon, List, Column, and/or Cover Flow) that you want it to apply to. (See "Get the most out of Finder views" for tips.)
Easy-to-see sidebars
Sidebars are important because they give you a list of items that you may want to use often, such as folders in the Finder.
iTunes and iPhoto: In iTunes and iPhoto, go into the programs’ preferences to change sidebar text size. In iTunes' General preferences, select Use large text for list views. And in iPhoto's Appearance preferences, choose Source Text > Large. (The two iPhoto text options available are 'Large' and 'Small', though I’d call them 'Medium' and 'Tiny'.)
The Finder: To change the size of items in the Finder’s sidebar, open System Preferences, and then click the General icon. In the 'Sidebar icon size' setting, you can choose 'Small', 'Medium', or 'Large'. This setting affects not only the Finder’s icons, but also the size of the associated text. Curiously, though this setting changes the same items in the sidebar in Apple’s Mail, it doesn't affect other Apple apps.
The three sizes available for Finder sidebar icons also affect the size of the associated fonts.
|
Other apps offer font and size settings too. Apple’s Mail has a slew of options in its Fonts & Colors preference pane (Mail > Preferences > Fonts & Colors). You can choose a different font and size for the message list, and for messages, as well as for any fixed-width text.
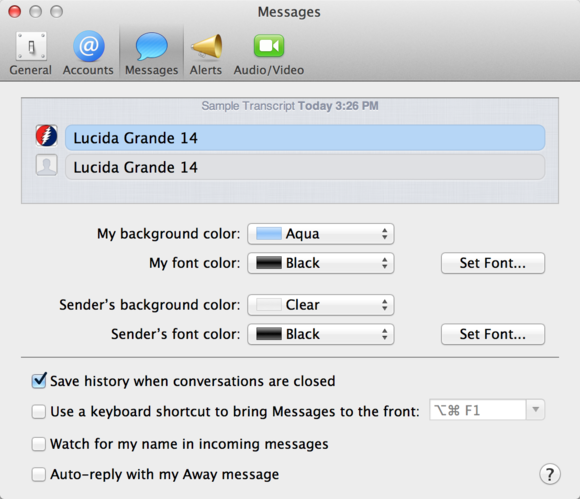
Apple’s Messages lets you change the font and size for incoming and outgoing messages independently. Go to Messages > Preferences, click Messages, and then click the Set Font button next to each of the two background color sections.
 |
In System Preferences’ Accessibility pane, you can turn on zooming that affects your entire display. Click the Zoom icon in the sidebar of that preference pane, and check either or both Use keyboard shortcuts to zoom and Use scroll gesture with modifier keys to zoom. I often use the scrolling option—which, on a trackpad, is a two-finger drag—to get a closer look at things that I can’t zoom any other way, such as text in graphics on webpages.
 |
No comments:
Post a Comment